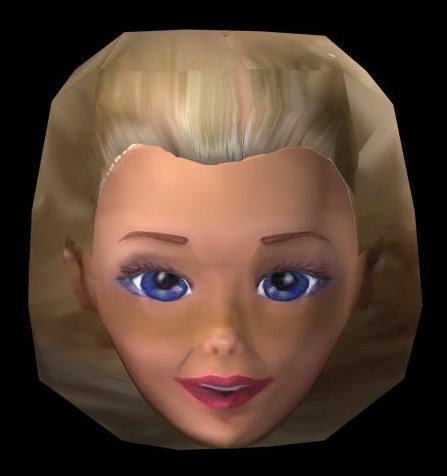
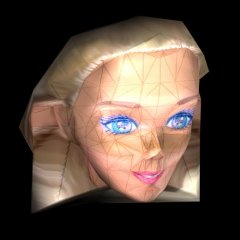
Texture Mapping
 
The first image uses flat shaded color, useful for
visualization during the modeling stage. The 2nd image
uses 2 bitmaps, one for the hair (256 x 256) and one for
the face (a 512 x 512 pixel .bmp file). To apply the map
correctly I used the Texporter plugin to create a
cylindrical texture map in Photoshop (see separate
Tutorial). The Unwrap UVW Modifier, built into 3DStudio
Max 2.5, helped to fine tune the placement of the Texture
Coordinates.
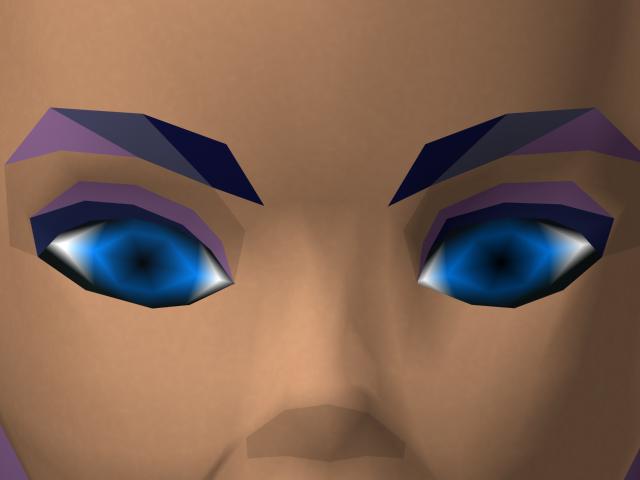
Per Vertex
Coloring
VRML supports
Per Vertex Coloring, but in most cases the results are
disappointing. However the classic example of where such
a technique might be useful is offered above. Note how
the striations follow the lines of the mesh, so the
orientation of the edges becomes an important part of the
design. Noise added to the skin may heighten the sense of
realism.
 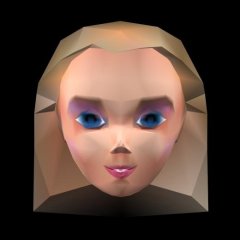
Through the use of Vertex Colors you can acheive subtle
shading effects, although you do not necessarily have
much control over the results. As in the example above,
Vertex Colors may actually be extracted from an applied
texture map, although the clarity of the image will be
affected by the density, or number of vertices in the
model.
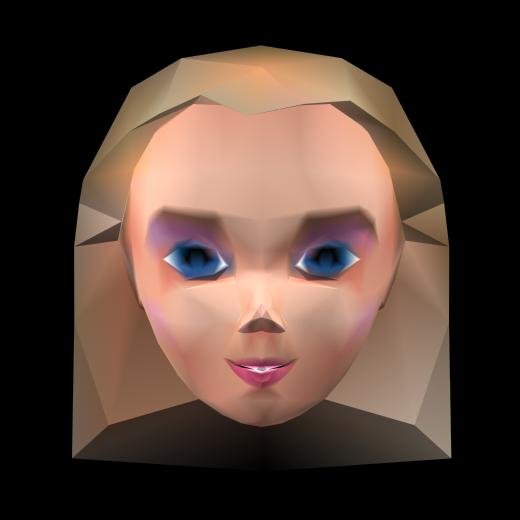
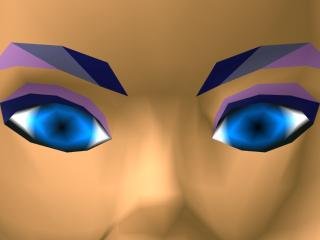
The image above right uses only Vertex Colors for mapping.
The Vertex Colors were derived from an applied texture
map, as shown on the left. When you apply the Vertex
Color Utility to a mapped object, Scene Lighting, as well
as the applied Bitmap, determine Vertex Colors. To see
the results, remove the Bitmap from the Material Editor.
The new Vertex Colors are stored in the Vertex Color
Modifier, added to the stack. But to access and edit
these Colors, you must collapse the stack into an
editable mesh first; then in the Modify Panel you are
given the option to edit the Vertex Color.
Stasia
McGehee
November 14th, 1998
|