Modeling with Splines
Surface Tools
Surface Tools, a plug-in for 3D Studio Max written by
Peter Watje and distributed by Digimation, is used to
convert splines to mesh objects. Much faster than Nurbs,
Surface Tools is a great tool for Organic Modeling.
Upon install it adds a Surface option to the Modify Panel.
However, it is somewhat finicky; you are often left with
gaping holes or inverted normals. The secret is to start
out by creating a Box (for this face I specified 9
Segments). Then delete all sides but the front panel, so
that you have a single grid-like plane. Another plug-in,
called MeshToSpline, will convert this mesh grid to a
collection of vertical and horizontal splines. Applying
the Surface Modifier to these Splines will create a
perfect surface. To be assured of good results, use these
splines as your starting point.
Surface Tools does not allow you to select and hide
individual splines. To get around this, create a 3d plane
that bisects your spline cage. You can then move this box
around, using it to occlude the splines you are not
working on.

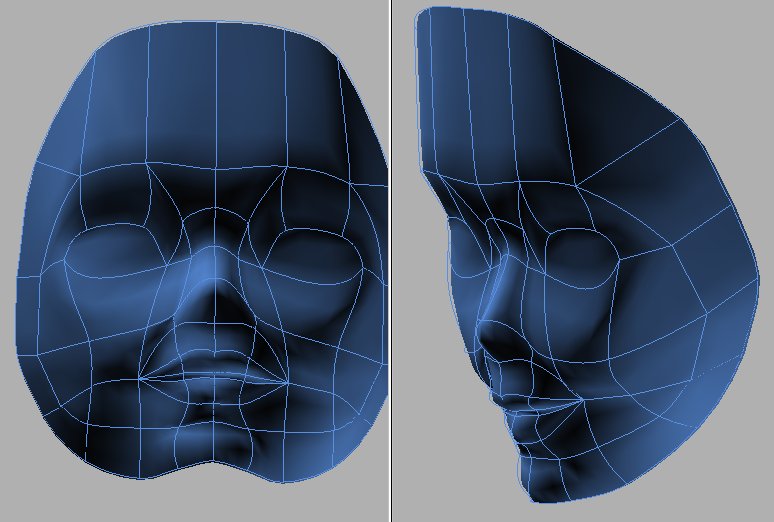
I created the splines for the face first. Once I got a
mask to surface, I then added splines corresponding to
the back of the head. With fewer vertices, the back of
the head has far less detail.
The fewer the splines the better - less room for error.
Also, I started out using Corner Vertices, then smoothed
them out as I went. This head built from splines is
output at 680 polygons. The eyes are inset as separate
objects. After the splines are surfaced, color is added
to the mesh.
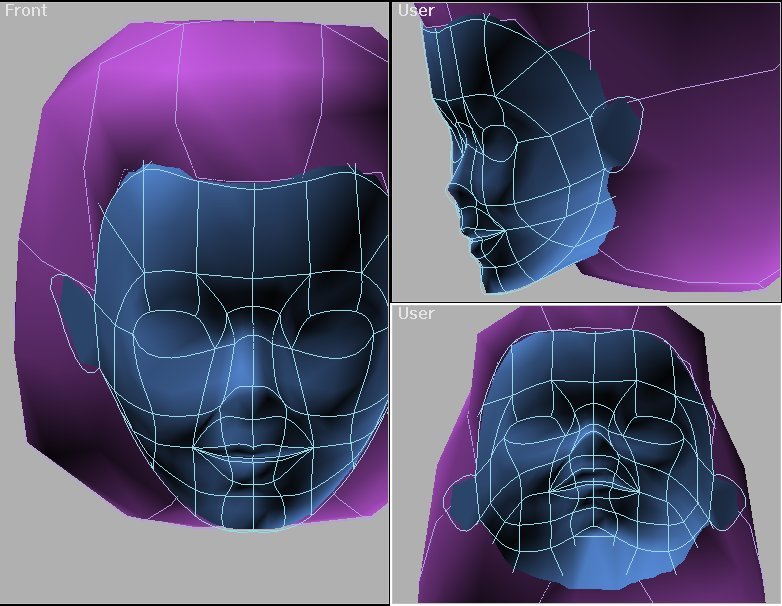
Here a hairpiece is modeled separately also using Surface
Tools. This head is about 620 polygons, the hair is less
than 200. You can specify the poly count of the object by
specifying how many vertices are added between each
control point. However this is a global parameter applied
to the whole object; you cannot specify areas of more or
less detail.
Stasia
McGehee
November 25th, 1998
|